Using NGINX to serve React Application (Static vs Reverse Proxy)
Table of contents
- STEP 1: Install Node and NPM
- STEP 2: Install NGINX
- STEP 3: Get your project into your server
- Step 4: Build your project
- Step 5: Copy Build folder projects into var/www/HTML
- STEP 6: Configure NGINX to serve static files
- STEP 6 (alternative): Configure NGINX to work as a proxy :
- STEP 7: Adding SSL Certificate with LetsEncrypt
So you have built an awesome React application. How can you show it to people? A good thing about React is it generates static assets. So you can serve it just like any other static website.
Today we will see how to serve our react app using Nginx in the Ubuntu server. NGINX is a powerful tool we can use with React to leverage its awesomeness.
Our target server can be any Ubuntu server instance like EC2 Instance in AWS or a Droplet in Digital Ocean, or even your local machine.
There are many tutorials on setting up your server in aws or digital ocean. I am not going over that. We will keep our focus on the setup of Nginx with React.
Imagine you already have an EC2 instance or Digital Ocean droplet running. Now ssh into your machine ….
STEP 1: Install Node and NPM
Okay, so now you have your project inside your machine, and now install node and npm. First, enable the node source.
curl -sL https://deb.nodesource.com/setup_12.x | sudo -E bash -
then install node
sudo apt install nodejs
Check node version
node --version
Check npm version
npm --version
STEP 2: Install NGINX
Run the following command.
sudo apt install nginx
Check if it’s installed correctly by using.
nginx -v
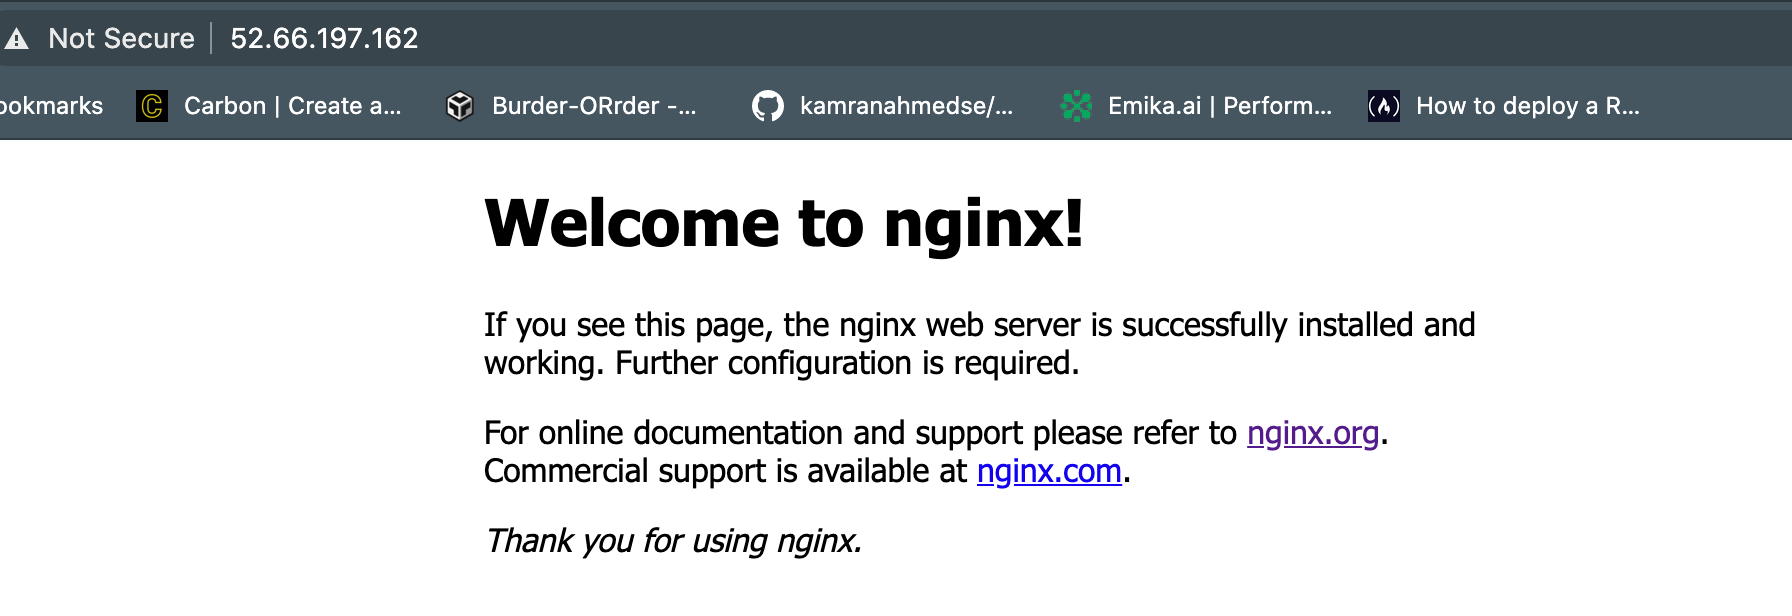
At this moment, if you go to your server's IP address, it will look something like this.

Now enable Nginx so that it automatically starts if the server restarts.
sudo systemctl enable nginx
Or You can check the status of your Nginx by typing.
systemctl status nginx
Which will give the output below

STEP 3: Get your project into your server
Get your project into your machine. If you are using HTTPS, it will look like
git clone your_repository_address
Step 4: Build your project
Go into your projects root directory, then build your react app as usual
npm install
npm run build
These commands will create an optimized production build and put the resources under the build folder. If you go inside your build folder, it will look something like this.

Here we have our index.html file and minified js bundle, which can be used to serve our website.
TIP: You can avoid the whole building process inside your server and build the project locally and transfer them into your remote machine using tools like scp. As we are serving static files, it will be enough.
Step 5: Copy Build folder projects into var/www/HTML
Now go back to the root folder of our machine, where the result of the ls command will give us the following output.

Now copy the contents of the build folder into var/www/html. It’s optional. You can put your files anywhere you like. you can create a separate folder for each project and keep the generated assets there.
For simplicity, we are keeping them under var/www/html/build. So it will be our root.
sudo cp -r /home/ubuntu/your-project-folder/build/. /var/www/html
STEP 6: Configure NGINX to serve static files
Now we need to configure our Nginx to serve these files. Write the following commands. I am using nano here.
sudo nano /etc/nginx/sites-available/default
Then edit the commands so that the final contents of the file look like this.

The contents are very straightforward here.
We are listening to Port 80
the root will be the location where we put our static contents
index will be our index.html file
server_name will be our server's IP address. It can also be other domain names that you can use.
inside the location we can serve our static content like images or pdf etc. For now we are using it as fallback content.
Then save the file using the following commands. If you are familiar with nano, you know them already!
CNTRL + X
Y (for yes)
Enter
Now we need to restart NGINX to see the results.
sudo service nginx restart
If we go to our server's IP address [http://your_ip_address_here], we will hopefully see our react app up and running.
STEP 6 (alternative): Configure NGINX to work as a proxy :
Sometimes we run our react applications using packages like PM2 or Forever. We run them using our node server that is built into create-react-app. But one problem is whenever we have to access that, we need to type in the port number into the address. For example, if we run our react app in this server on port 300 (the usual one), to access our site, we need to go to http://your_ip_address_here:3000 your browser. Nginx can solve this problem.
For this, we can run the following commands from inside our project's root directory to run the app. We are not going too deep into the topics here. To run our react app using Forever, we can use the following command from inside our project.
forever start -c "yarn start" ./
or using pm2
pm2 start node_modules/react-scripts/scripts/start.js --name "your-project-name"
Now, if we visit the your_ip_address_here:3000 address from the browser, we can see our app is up and running.
Now we will enable our firewall to block access to all the ports.
sudo ufw status  // it will say our firewall is inactive

sudo ufw enable  // it will enable our firewall

sudo ufw app list // it will list the apps
If we check the status now, it will be active, But if we want to access our application, we won't be able to do it because the firewall will block us. We need to run the following command(s) to allow access.
sudo ufw allow 'Nginx HTTP'  // to allow HTTP only (enough for now)

sudo ufw allow 'Nginx HTTP'  // to allow https

sudo ufw allow 'Nginx Full'  // to allow full nginx
Now visiting our server, we will not see our app running because we didn’t allow port 3000 to the outside world.
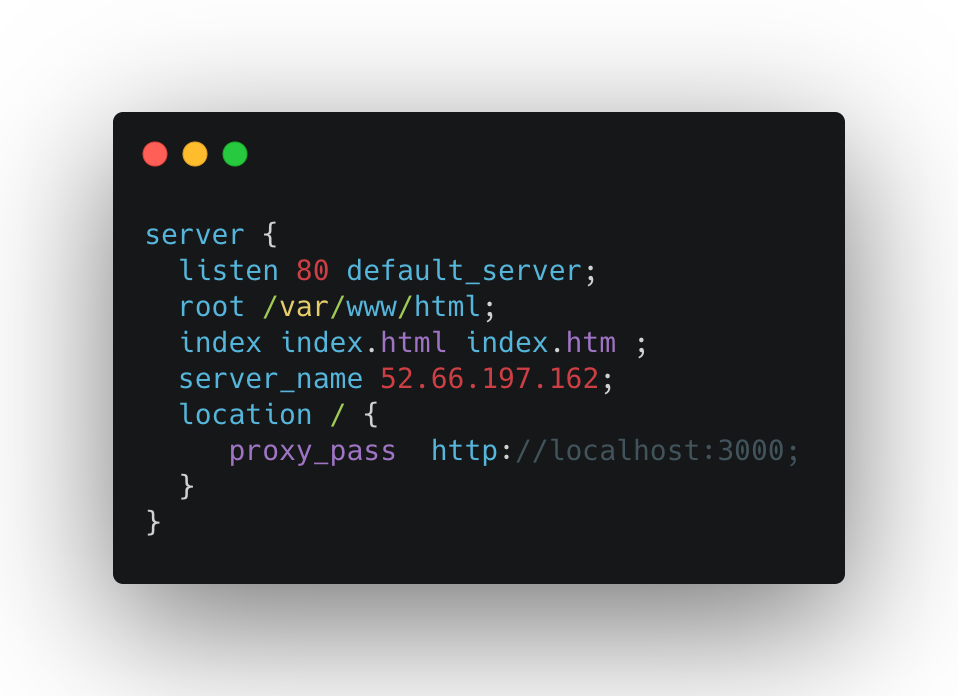
We need to configure our Nginx to forward the port 80 to our 3000 port. To do that, we need to configure our Nginx again, just like before. This time the contents will be

Save the file just like before.
Here we are using proxy_pass to say that we need to redirect the requests into port 80 to localhost:3000, where our application is running.
Cheers! Now we can visit our app on http://your_server_ip_address without specifying the port at the end of the address!
STEP 7: Adding SSL Certificate with LetsEncrypt
It is easy to attach a free SSL certificate for our site using Nginx. Run the following commands to install certbot in our ec2 instance.
sudo apt-add-repository -r ppa:certbot/certbot
sudo apt-get update
sudo apt-get install python3-certbot-nginx
sudo certbot --nginx -d yourdomain.com -d www.yourdomain.com
It will ask for your email, and you are done.
This certificate will be valid for 90 days. You have to run the following command to update your certificate.
certbot renew --dry-run
You have to add your IP address to your DNS server to take effect.
Now, if you go to https://yourdomain.com, you will see that it is being served over HTTPS.
So that’s it for today. Happy Coding! :D
Get in touch with me via LinkedIn or my Personal Website